Afflictor

Original upload date: April 24 2014

I experimented with another one of GW’s Technical Paints on my Afflictor. Nurgle’s Rot is weird, it’s semi-clear and rubbery. I built up successive layers to simulate a drop oozing out of the stinger. Eww.

sginrq8l

Unfortunately, a few days later I pulled it out of my foam case and was confronted with this:

2wapnv5l

The drip was so rubbery that it absorbed the texture from my foam and got squished. I had to get rid of it. So here’s my revised Afflictor minus the drip. I still think it was a cool idea, but sometimes experiments just don’t work out.

Afflictor

Thanks for reading, likes/shares/comments are appreciated!

Vayl, Consul of Everblight

Original upload date: February 16 2014

I’ve finished Vayl2. I used her as a practise model during Meg Maples’ Masterclass painting workshop.

Vayl Consul of Everblight

Meg showed us how she paints her amazing eyes. It’s quite a bit more involved than my usual minimalist approach, but basically goes:
Step 1: Black
Step 2: White leaving black outline
Step 3: Black circle in centre
Step 4: Bright colour in black circle
Step 5: Tiny black dot in top half of bright circle
Step 6: White reflection dot

It was incredible to watch her do this, and which such a large brush as well! My attempt misses out on the final step, but I’m pleased nonetheless. Here’s my attempt:

Vayl Consul of Everblight

Later on I took some pics while experimenting with a $1 lens from ebay (like these here). It sticks onto a mobile phone and acts like a macro lens.

e18qwlrl

Her green eyes show up a little better when when taking pictures with it, but I couldn’t avoid that slight orange tint around the photo or manage to keep the lens cap out of the shot!

Vayl Consul of Everblight

Thanks for reading, likes/shares/comments are appreciated!

Throne of Everblight Conversion: The Tentacles

Original upload date: January 7 2014 – May 16 2015

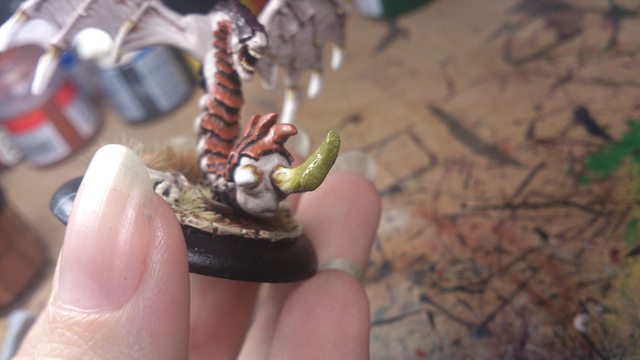
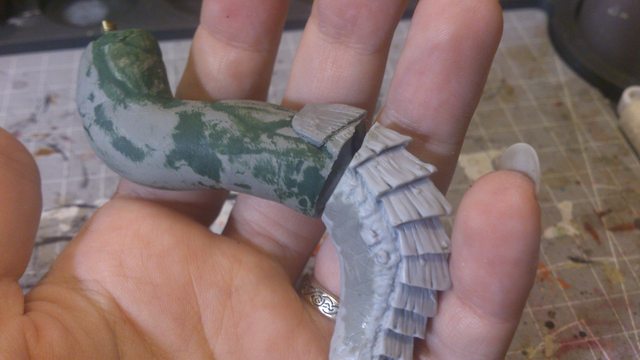
I chose this tentacle as the base anchor for the portal as it has a small flat section that fits onto the platform the best. I started by sawing off the end of the tentacle. It widens to socket into the beast’s body but I wanted to lengthen and change the angle to have it emerging from the pool above. I then hollowed out the top section so that I could have an increased surface area to attach the new top half of the tentacle. I drilled out a deep pin hole to support the upper tentacle and platform. This time I used a hollow brass rod to minimise weight.

Throne of Everblight Conversion

I want to assemble the model in three sub-assemblies to make it easier to paint, and that means I need this tentacle connection to remain separate until the painting is done. I made a plug of putty as my starting point for the upper tentacle. I liberally applied vaseline to the socket so that the putty plug will be a perfect fit, but not stick.

Throne of Everblight Conversion

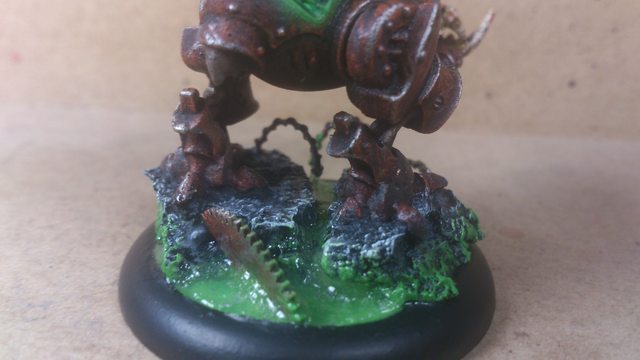
I decided to wrap a tentacle around the platform for cool factor. I started by forming the basic shape out of aluminium foil. I use al foil as an armature as it is lighter and cheaper than putty, but it is not load-bearing so I needed to pin the claw through the putty into the platform.

Throne of Everblight Conversion

I then sculpted putty over the top of the foil, joining it up with the original claw.

Throne of Everblight Conversion

I realised at this point how long this conversion was going to take me. I could only sculpt a couple of scales at a time (or risk smudging) and I had about a hundred to go! Ugh.

Throne of Everblight Conversion

I started to thicken up the support tentacle and add scales. It was important to match up the thickness so that it blends together when it’s all joined up to the portal, but for now I wanted to keep the pieces separate so that I could paint underneath the portal more easily. It’s taking a long time because I keep messing it up the thickness and the scales.

Throne of Everblight Conversion

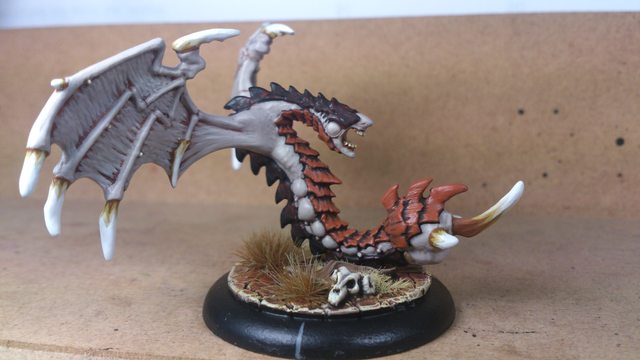
The two side tentacles are done. I had to saw off the ends as they thickened to fit into the Throne’s sockets. I want to make it look like the body of the beast is much higher on the other side of the portal, so the thickness of the tentacles needed to be more uniform. For that reason I filled in some of the musculature at the top of the tentacle as well. Some of the tentacles had a flattened section to rest on the base, because mine will be in mid-air I needed to fill out those flattened sections.

Throne of Everblight Conversion

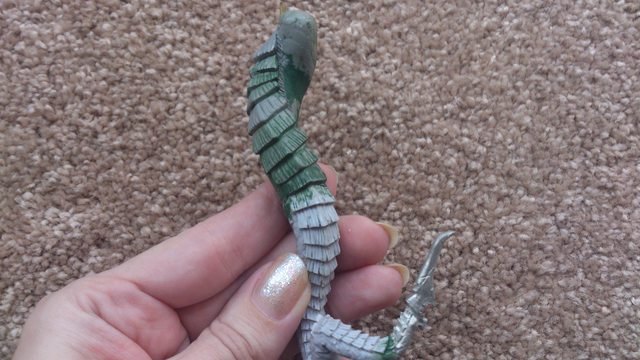
Here’s the top half of the wrapping tentacle. I learned a lot from my mistakes with the first one so I got the shape completely done before I started the scales.

Throne of Everblight Conversion

As opposed to this one, which I was very unhappy with. I lost count now of how many times I sliced greenstuff off and started again. It’s vertical so that it can support the weight of the structure but it just doesn’t look right.

Throne of Everblight Conversion

So, after stripping it and resculpting several times I decided to start over and curled the putty around the brass rod. I think it’s an improvement but I wasted several months of sculpting those damn scales! That’s the new one on the left.

Throne of Everblight Conversion

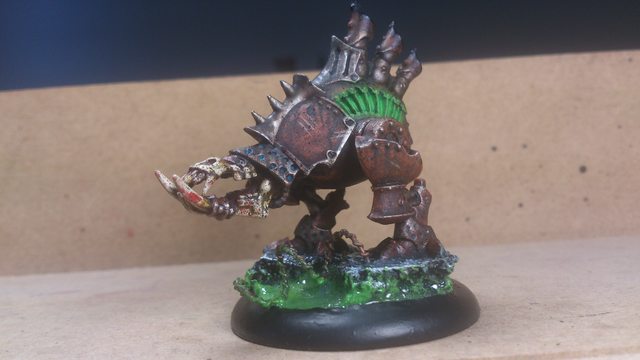
Here it is connected to the resin tentacle.

Throne of Everblight Conversion

This conversion has taken me a very long time. I experienced delays when my putty never arrived. I tried a different putty and it turnout so badly that I had to rip it all off and start again. I also had to start the first tentacle from scratch. All together it took the fun out of the project and so I was dragging my heels on the conversion. (Don’t worry, it’s finally finished now!)

Thanks for reading, likes/shares/comments are appreciated!

Deathripper

Original upload date: January 4 2014

This was my test model for Cryx. It was my first real attempt at painting dirty!

Deathripper

Painting dirty sure has its perks. If I made a mistake, I just covered it with dirt instead of fixing it. This made the model REALLY fast to paint, I finished it in one afternoon! The base however was a different story. I lost count  of how many layers of water effects I had to use, taking days to dry between each application.

Ooze Base

Thanks for reading, likes/shares/comments are appreciated!

Deneghra Conversion

Original upload date: December 6 2013 – April 6 2014

I decided to take a break from my Legion and try the Warmachine side of the game for a change of pace.

Deneghra Conversion

I’ve never been a fan of the Deneghra model but when I broke her out of the box I realised that her body is actually quite nice, it’s just her dragonfly helmet that bugs me (heh). I used pMorvahna’s head because I love how Werner Klocke does his female cheekbones, but I wanted to replace her characteristic hair. I used pLylyth’s hair and tried to match the flow direction to her skirt. Lylyth has a couple of spiky growths coming out of her head which I intended to remove, but instead decided to sculpt into a tiara.

Deneghra Conversion

And here she is painted up. I looked up artwork of Haley and tried to match the hair colour.

Deneghra Conversion

Thanks for reading, likes/shares/comments are appreciated!