
Original upload date: September 7 2013 – September 30 2013
I converted up a mounted version of the plastic Lylyth to use as my Raptor unit leader and wrote a little guide in case anyone wanted to copy the idea:
Aella’s Guide to Converting Lylyth4: Raptor Leader of Everblight
Step 1: Assemble your bits. For this conversion you will need:
- One Raptor (you will not need the rider’s torso)
- One Plastic Lylyth (you will not need her legs)
- Optional: One Raptor Bow

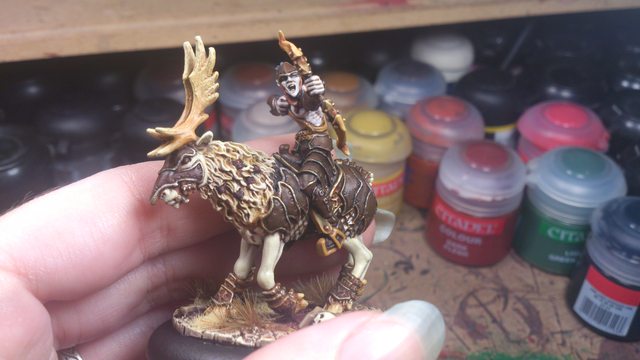
Step 2: Remove mould lines from all the pieces and glue the two halves of the elk mount together onto its base.
Step 3: Lylyth’s cloak has a raised socket moulded into it for her legs to fit. Gently and carefully use a modelling knife to remove this bulk. You will want her cloak to be approximately uniform in thickness. Do not worry about making it smooth as this part of the cloak will be obscured in the final assembly.
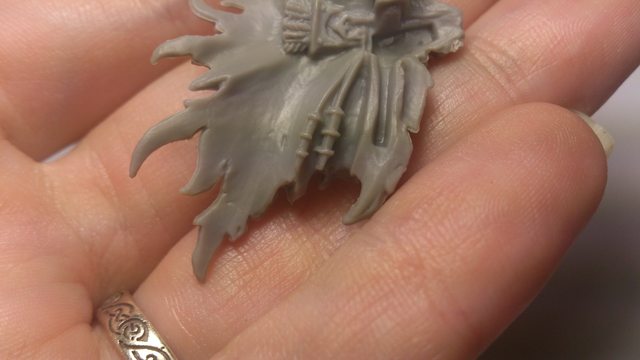
Step 4: Lylyth’s cloak initially hangs below her torso. We need to change the angle so that it flows out behind her over the mount. This is why it’s handy to use the plastic version of Lylyth. Heat the plastic and slowly bend the cloak backwards. You will need to continually dry-fit Lylyth against your assembled elk mount to see how she fits. I found my hair-dryer to be too slow for this, so I popped her into a pot of boiling water. Be aware that you will only have a few seconds to bend the plastic before it hardens again. Take your time, bend, test and reheat until you are satisfied with the fit. If she isn’t bending well, you may need to go back to Step 3 and cut the cloak a little thinner.
Note: You could use the metal Lylyth model for this conversion, but the P.P. metal is brittle and not suited for bending. You may need to resculpt the cloak instead. Additionally the metal version of this sculpt is not conveniently separated at the waist.

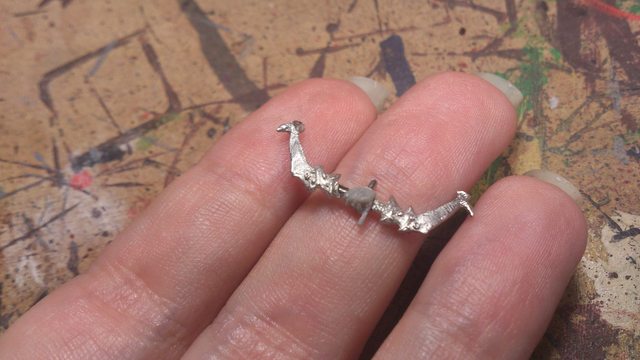
Step 5: (Optional) You may use the original Lylyth’s weapon, but I thought it was too recognisable, and I wanted to tie her more closely into the Raptors unit. Use a sharp hobby knife to remove Lylyth’s hand from the bow and trim the excess. I chose to separate her wrist as well so that I could rotate the bow’s angle to one I preferred. Pin the new weapon to Lylyth’s hand, taking care that the bow is straight.
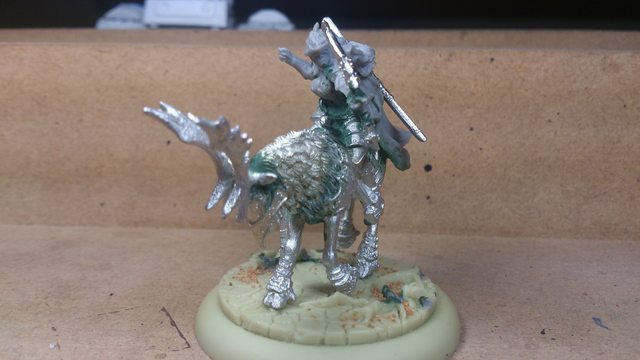
Step 6: Assemble the rest of Lylyth as normal, adding the Raptor’s sword to her back.
Step 7: Fill up any gaps with your product of choice, and admire your handiwork!
Here is the finished Lylyth Raptor Leader. She was a relatively easy conversion, and very quick too.


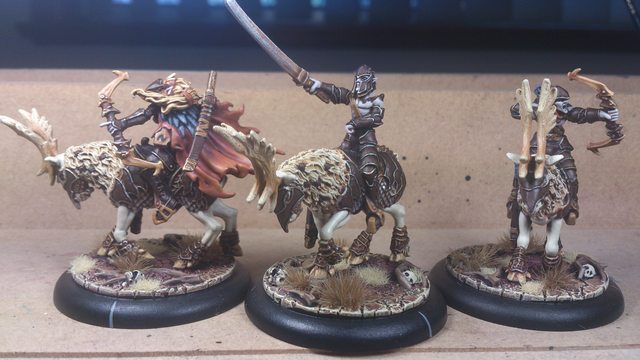
And here are the painted Raptors:

Thanks for reading, likes/shares/comments are appreciated!

