Original upload date: September 22 2013
I like how the nose on his bear cloak turned out.


Thanks for reading, likes/shares/comments are appreciated!

I like how the nose on his bear cloak turned out.
Thanks for reading, likes/shares/comments are appreciated!

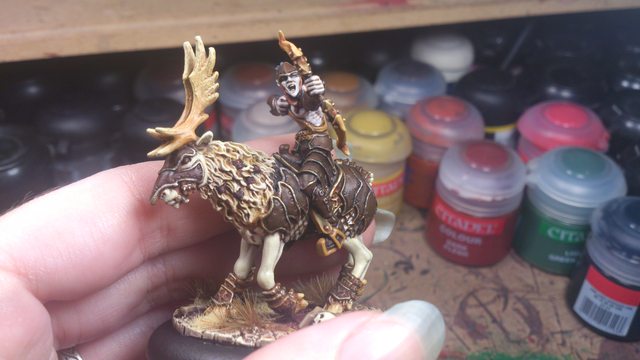
I converted up a mounted version of the plastic Lylyth to use as my Raptor unit leader and wrote a little guide in case anyone wanted to copy the idea:
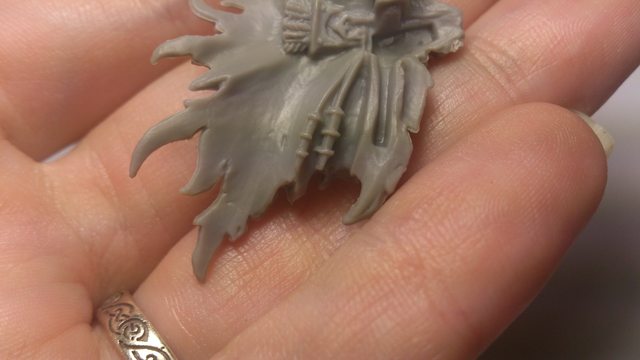
Step 1: Assemble your bits. For this conversion you will need:

Step 2: Remove mould lines from all the pieces and glue the two halves of the elk mount together onto its base.
Step 3: Lylyth’s cloak has a raised socket moulded into it for her legs to fit. Gently and carefully use a modelling knife to remove this bulk. You will want her cloak to be approximately uniform in thickness. Do not worry about making it smooth as this part of the cloak will be obscured in the final assembly.
Step 4: Lylyth’s cloak initially hangs below her torso. We need to change the angle so that it flows out behind her over the mount. This is why it’s handy to use the plastic version of Lylyth. Heat the plastic and slowly bend the cloak backwards. You will need to continually dry-fit Lylyth against your assembled elk mount to see how she fits. I found my hair-dryer to be too slow for this, so I popped her into a pot of boiling water. Be aware that you will only have a few seconds to bend the plastic before it hardens again. Take your time, bend, test and reheat until you are satisfied with the fit. If she isn’t bending well, you may need to go back to Step 3 and cut the cloak a little thinner.
Note: You could use the metal Lylyth model for this conversion, but the P.P. metal is brittle and not suited for bending. You may need to resculpt the cloak instead. Additionally the metal version of this sculpt is not conveniently separated at the waist.

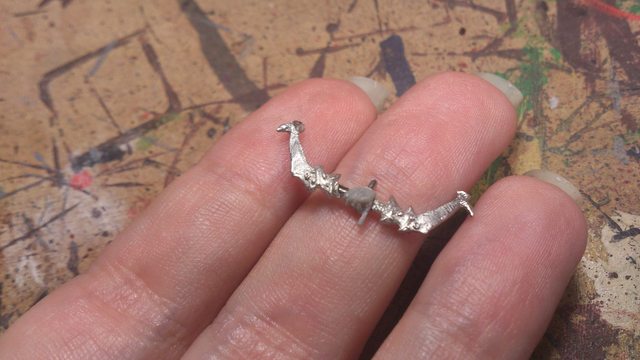
Step 5: (Optional) You may use the original Lylyth’s weapon, but I thought it was too recognisable, and I wanted to tie her more closely into the Raptors unit. Use a sharp hobby knife to remove Lylyth’s hand from the bow and trim the excess. I chose to separate her wrist as well so that I could rotate the bow’s angle to one I preferred. Pin the new weapon to Lylyth’s hand, taking care that the bow is straight.
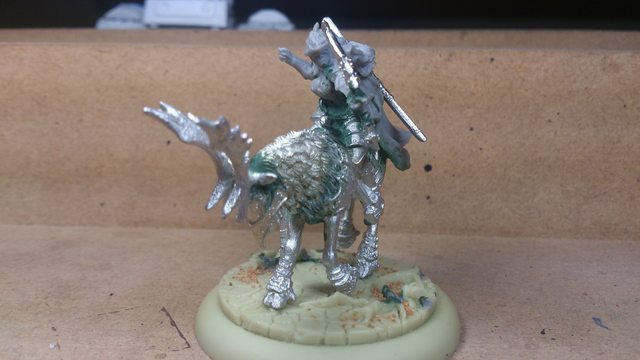
Step 6: Assemble the rest of Lylyth as normal, adding the Raptor’s sword to her back.
Step 7: Fill up any gaps with your product of choice, and admire your handiwork!
Here is the finished Lylyth Raptor Leader. She was a relatively easy conversion, and very quick too.


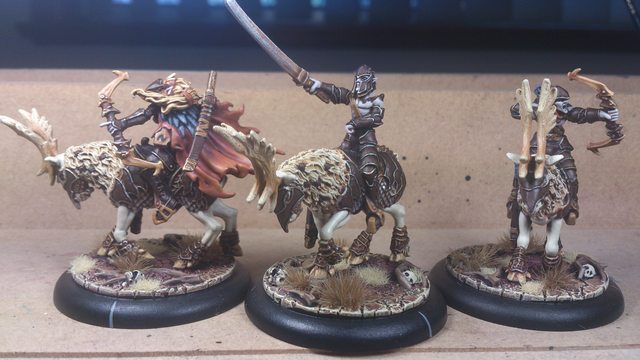
And here are the painted Raptors:

Thanks for reading, likes/shares/comments are appreciated!

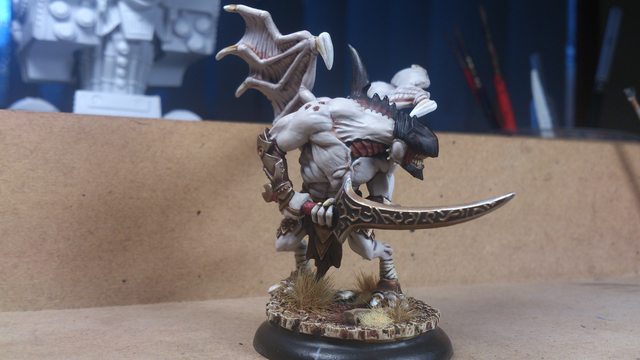
I finished up my Nephilim Soldier for the Journeyman League.
Thanks for reading, likes/shares/comments are appreciated!

This is only a tiny conversion. I didn’t like the webbing on the original Harrier’s head, so I chopped it off and gave them a little horn to make them look more like the Shredders.

Thanks for reading, likes/shares/comments are appreciated!

This was my first Minions model. At first I thought this would be a quick and easy one-colour model, but then I looked up some pics for inspiration and found the monotone to be a little boring. So, I started having this crazy idea of his colour changing from neutral colours matching my beasts at the bottom to an ethereal blue up top.

The white blending was hard and I think I might have gotten a little RSI on my wrist (Ouch!) but I really enjoyed watching him transform.

Thanks for reading, likes/shares/comments are appreciated!

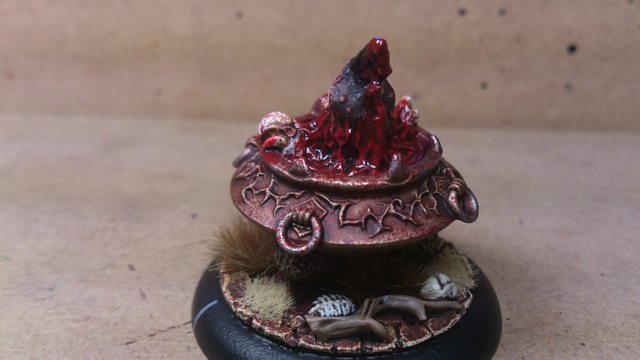
Perhaps I should clarify that it is the Spawning Vessel Acolyths that are converted, and not the pot itself.
As usual I didn’t want duplicates, and unfortunately the six Acolyths only come in two poses. Luckily they were easy enough to tweak. The one on the left is stock-standard haft-you-in-the-face pose. The middle one I slightly lowered the weapon into a more relaxed stance. I then had to sculpt a new upper arm for her as well as the feathers on her cloak which I damaged as I tried to repose her. The last one involved snipping the hand off the weapon and pinning it back together. I then sculpted back in the missing weapon haft, her upper arm and a rudimentary dagger.

I had trouble fitting her arm into a natural position and I wasn’t happy with the dagger, so I changed the angle and replaced her dagger with a shard of bone, which I think suits the unit better.

Here’s the finished Spawning Vessel unit:

In my mind, I imagine that the blight affects the Nyss in different ways. Sometimes it’s only a cosmetic change, like the little spikes jutting out of Saeryn’s face. Sometimes it’s a useful change like the legs of the Striders. Sometimes I imagine that the blight is a bad change, like horrible weeping protrusions that cause the bearer discomfort or pain. If the blight is particularly bad, the affected individual may have no choice but the wrap themselves in bandages and march behind the Everblight army, picking the field clear of corpses. Like lepers, they would be shunned for their affliction and their fellow Acolytes of the Vessel would be their only company.

With that in mind I stained their bandages and painted their robes black to emphasise their cultist look, and their separation from the rest of the army. I had fun painting this unit, but I might have gone a little overboard with the blood splatter!
Thanks for reading, likes/shares/comments are appreciated!

Here’s the Nephilim Bolt Thrower that I like to use with Lylyth2. It was about this time that I joined a Journeyman League at a local club and starting learning how to actually play this game!

Thanks for reading, likes/shares/comments are appreciated!

I disliked Thagrosh’s pointy head, so I tried something quite ambitious for my skill-level at the time. Up until this point, my greenstuffing skills consisted mostly of gap-filling and head/weapon swaps. I think this project, and the positive feedback I received for it, really helped inspire me to try even more ambitious projects, like my Deathstalker and later my Throne of Everblight Horror.
First, I cut away parts of his head and sculpted armour plates and filigree over the top. This is a WIP after I’d finished the edges and begun working the spirals inward.
I decided that I disliked his long loincloth so I cut it off and tried sculpting a new one. It was my first time sculpting cloth, so there’s room for improvement.
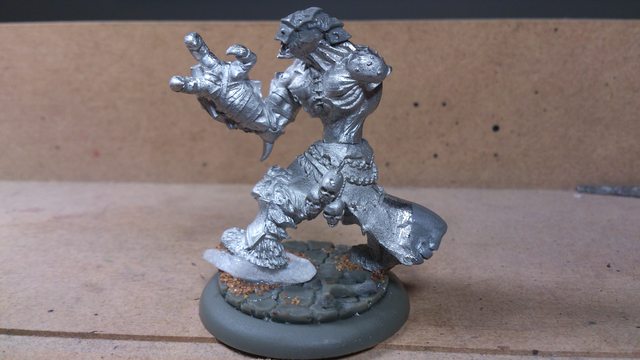
Here’s the finished conversion. In summary, after chopping off his pointy head, I added a helmet and filigree. I then chopped off his long cloth and resculpted a shorter one. I added a leather executioner-style hood with a couple of stitches and finally a fur trim to his cloth.

I think the folds in his leather could be better and the fur would have been better if it were a little shaggier. I put this down to my complete inexperience sculpting these textures, so it’s a point I can improve upon next time.
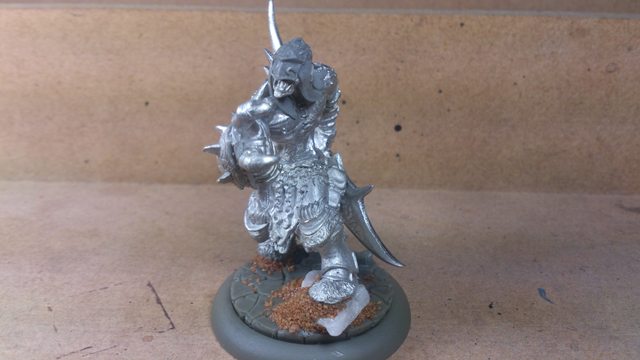
My favourite bits would have to be the way I managed to get his hood to swoop around, adding a little movement to an otherwise static model.

And here he is painted up:
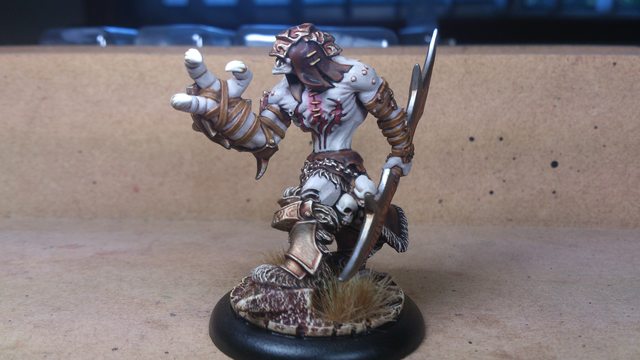


When I started painting him, I became worried that all those browns and neutral colours would look a little dull. So I took advantage of his large chest area to incorporate a tattoo. I found it very tricky to blackline and highlight because it is so small, but I am pleased with the end result.
Thanks for reading, likes/shares/comments are appreciated!

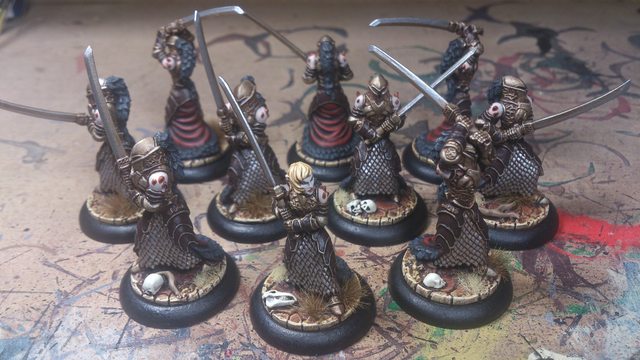
I had a lot of fun painting the Legionnaires, it’s a pity they’re mostly food for the Spawning Vessel!
Thanks for reading, likes/shares/comments are appreciated!

I magnetised the Proteus’ head to fit on my Ravagore/Scythean multi-kit. I have to admit, I’ve never used him in a game!

Thanks for reading, likes/shares/comments are appreciated!

